
Are you looking to enhance the health and productivity of your garden? Look no further than the art of soil crafting. In this article, I’ll guide you through the process of building your own soil craft blend and show you how to make the most of it in your gardening endeavors. Whether you’re a seasoned gardener or just starting out, understanding how to create and use a soil craft blend can make a significant difference in the success of your plants.
Build a Soil Craft Blend How to Use
Choosing the Base Components
When it comes to building your own soil craft blend, it’s important to start with the right base components. These components provide the foundation for your blend and help create the optimal growing environment for your plants. Here are a few key base components to consider:
- Compost: Compost is an excellent addition to any soil blend as it improves soil structure, adds beneficial microorganisms, and provides a slow release of nutrients. Look for high-quality compost that is fully decomposed and free of any contaminants.
- Peat Moss: Peat moss is another essential component that helps retain moisture in the soil, improves drainage, and adds organic matter. It’s important to choose sustainably sourced peat moss to minimize environmental impact.
- Perlite: Perlite is a lightweight volcanic rock that improves soil aeration and drainage. It helps prevent soil compaction and allows roots to access oxygen more easily. Be sure to choose a fine-grade perlite for optimal results.
Adding Organic Matter
To further enhance the nutrient content and overall health of your soil craft blend, it’s crucial to incorporate organic matter. Organic matter not only provides essential nutrients but also improves soil structure and water-holding capacity. Here are a few ways to add organic matter to your blend:
- Leaf Mold: Leaf mold is created by decomposing leaves over time and is a fantastic source of organic matter. It improves soil structure, retains moisture, and provides a slow release of nutrients. Collect fallen leaves in the fall and create a leaf mold pile for future use.
- Worm Castings: Worm castings, also known as vermicompost, are rich in beneficial microorganisms and nutrients. They improve soil fertility, enhance plant growth, and help suppress diseases. Consider adding worm castings to your blend for a nutrient boost.
- Green Manure: Green manure crops, such as clover or alfalfa, can be grown and then tilled into the soil to add organic matter. They help improve soil structure, increase nitrogen levels, and suppress weeds. Plant green manure crops in the offseason to prepare your soil for the next growing season.
Building your own soil craft blend allows you to customize the nutrient content and create the ideal growing environment for your plants. By choosing the right base components, adding organic matter, and incorporating nutrient amendments, you can optimize plant growth and ensure the success of your garden. So roll up your sleeves and start crafting your perfect soil blend today!
Using Your Soil Craft Blend
Preparing Your Planting Area
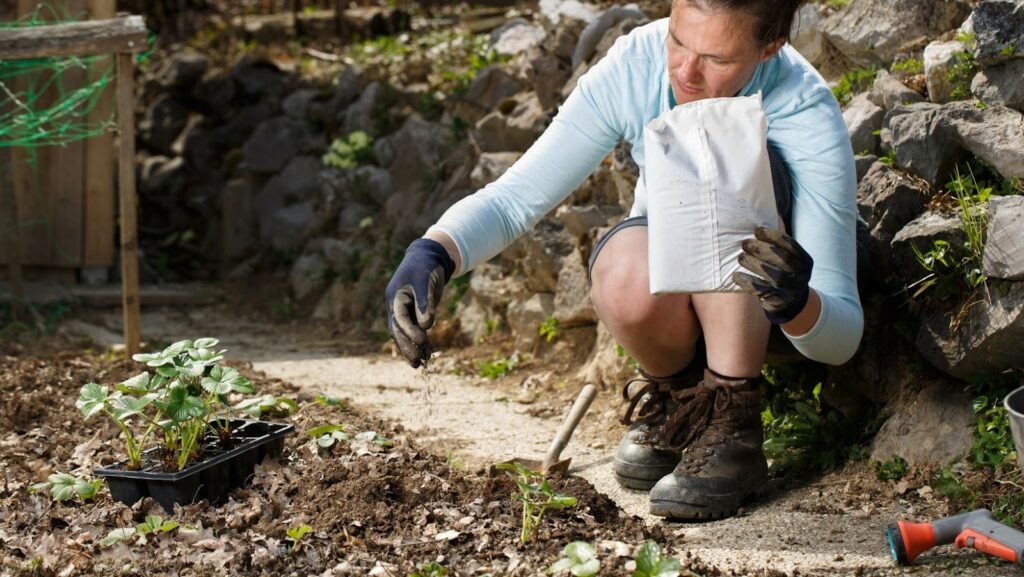
Before using your soil craft blend, it’s important to prepare your planting area properly. Follow these steps to ensure the best results:
- Clear the area: Remove any weeds, rocks, or debris from the planting area. This will create a clean and healthy environment for your plants to grow.
- Loosen the soil: Use a garden fork or tiller to loosen the soil in the planting area. This will improve drainage and aeration, creating a welcoming environment for your plants’ roots.
- Mix in the soil craft blend: Once the soil is loosened, it’s time to incorporate your soil craft blend. Spread a layer of the blend over the planting area and use a garden rake to mix it into the top few inches of soil.
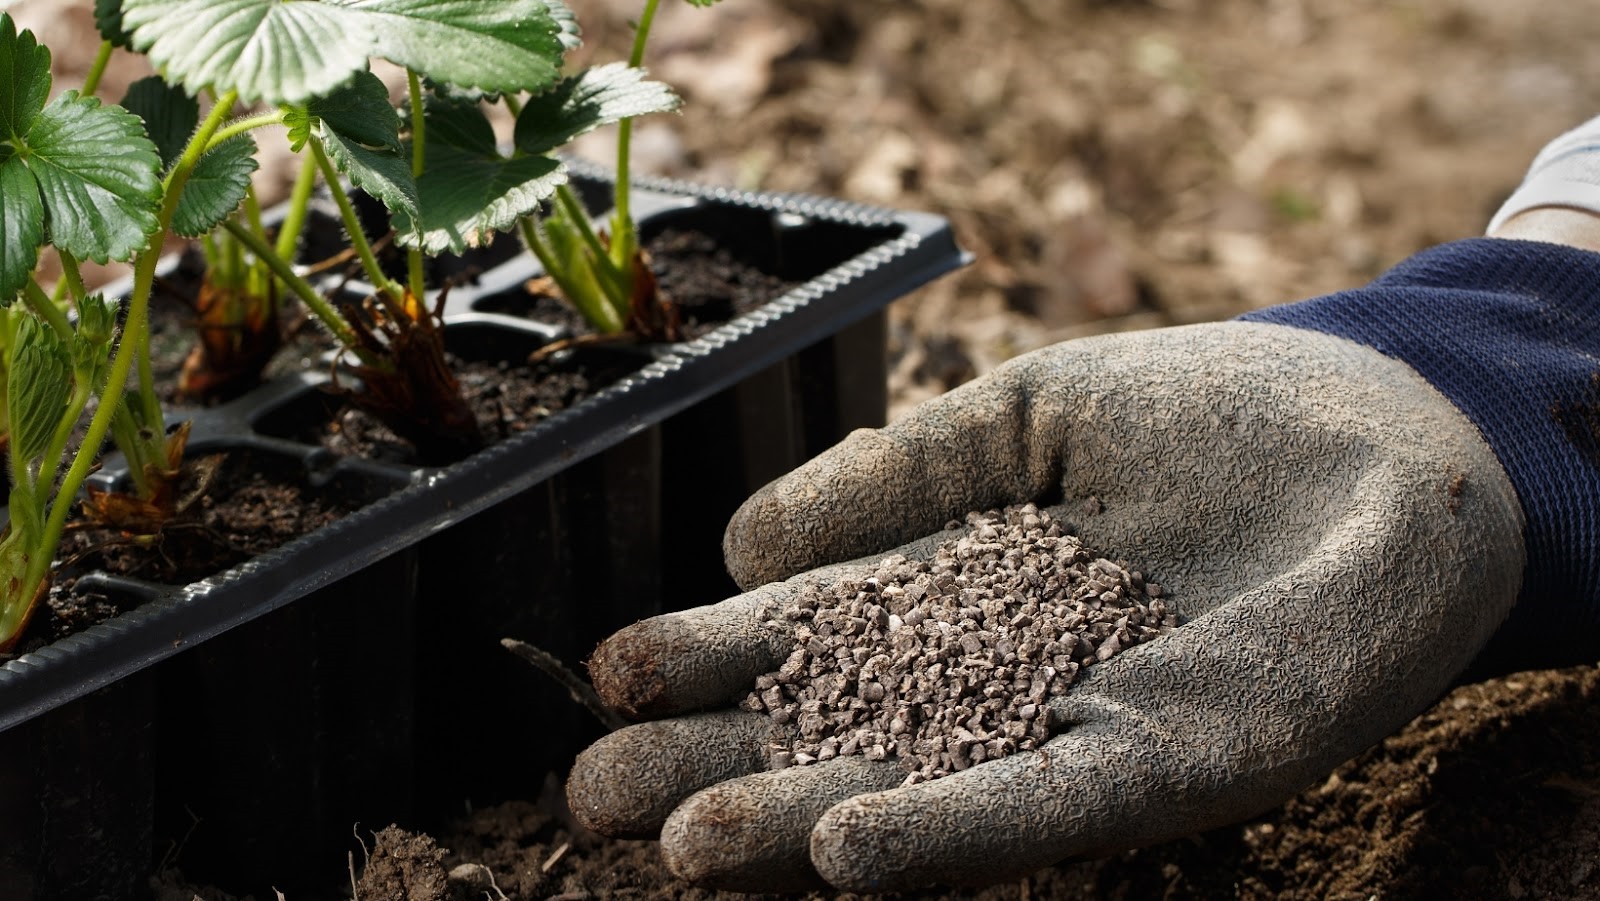
Properly Planting Seeds or Seedlings
Using your soil craft blend to plant seeds or seedlings is a straightforward process. Follow these steps to ensure successful growth:
- Dig a hole: For seeds, create a small hole in the soil according to the recommended depth on the seed packet. For seedlings, dig a hole that is slightly larger than the root ball.
- Place the seeds or seedlings: Gently place the seeds or seedlings into the holes, making sure they are properly positioned.
- Cover with soil craft blend: Carefully cover the seeds or seedlings with your soil craft blend, ensuring that they are fully surrounded by the nutrient-rich mixture.
- Water thoroughly: After planting, water the area thoroughly to help the soil craft blend settle and provide moisture to the seeds or seedlings.
Remember, using a soil craft blend is an ongoing process. As your plants grow and develop, continue to monitor their needs and adjust your maintenance routine accordingly. By following these steps, you’ll be well on your way to successfully utilizing your soil craft blend and achieving thriving and productive plants in your garden.